Design an iOS wishlist app prototype with Justinmind and help your users shop the perfect gifts this Christmas
The wishlist app is making the gift of giving so much easier for mobile users this Christmas.
According to Big Commerce, more than half of all US consumers alone browse for gifts with their mobile devices during the holidays. And with Christmas just around the corner, millions of users worldwide are downloading Android and iOS wishlist apps like Wish, Wishmindr and Giftry.
The wish list feature in eCommerce is known to contribute to successful checkout page strategies and improve site conversion rates, according to Kissmetrics. Wishlist apps combine all the best bits of the wish list feature, with the added bonus that users can browse all of their favorite brands in the same place!
So awesome, and yes, so easy to do yourself. Learn how to design a wishlist app in your Justinmind iPhone app prototype here!
What is a wish list app?
Wish list applications make gift exchanges easier for everyone by enabling users to organize them quickly, easily and all in one place. App users can create lists of items that they need or want or explore gift ideas for others. After browsing and adding gift items to these lists, they can then share items or entire lists with their contacts.
Imagine you’ve started a new job around the holidays. You’ve been asked to participate in a Secret Santa gift exchange, despite knowing hardly anyone there. If your team were using a wishlist app, you’d be able get something that your colleague actually really wants.
What can users find in a wish list app
Most wishlist apps include features that allow users to:
- Browse through millions of products from a wide range of categories
- Mark gift ideas to share/purchase at a later date
- Refine search by size, color, price and rating
- Add items to wish list and view them at any time
- Create multiple wish lists
- Exchange gift ideas with gift givers via device-to-device sharing
How to prototype a wish list app with Justinmind
Designing your iOS wishlist app prototype with Justinmind is really easy. Learn more about the importance of prototyping in your web and mobile designs here.
When prototyping with Justinmind, you’ll have a complete set of iOS widgets, icons and readymade screens that you can pair with our dynamic and data-driven features to make your app interactive as well as pixel-perfect.
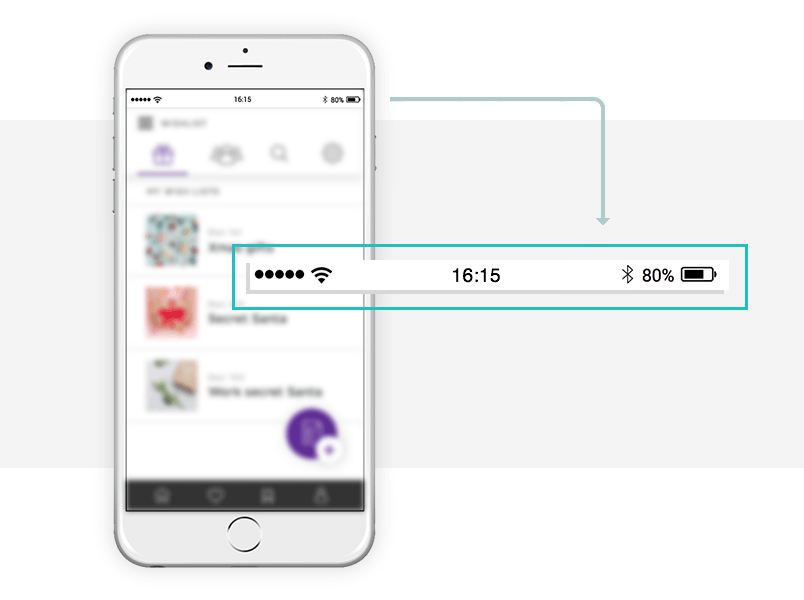
To get started, create a new mobile app prototype. We are going to use an iPhone prototype template, but feel free to use Android if you prefer – the prototyping process won’t change. Start by giving your app a header and footer by choosing a status (header) and bottom (footer) bar from the iPhone widget library (the palette is on the left of the canvas). Drag these widgets to the canvas and place them at the top and bottom the screen.
Using dynamic content to create our wishlist app tabs and screens
Our app is going to have four main screens, separated by tabs. These screens are:
- Home screen, where the user will find their wish lists
- Invite Friends, where they can share gift ideas with their contacts
- Search, where they can browse gifts
- Settings, where they can configure profile and notification settings
You’ll be using dynamic panels to create the structure of the app’s screens. The dynamic panel is a container widget, which means it can hold other UI widgets.
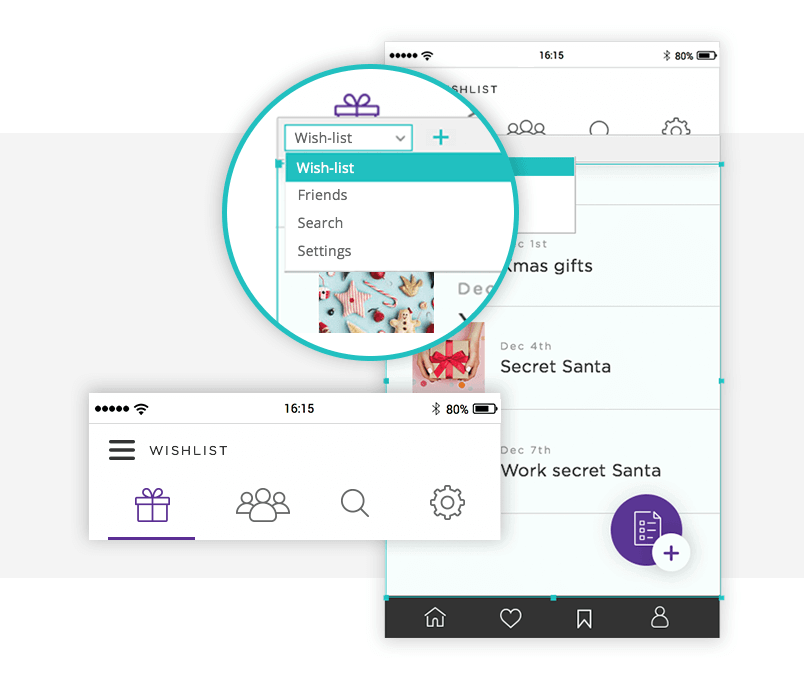
From the Dynamic Content collection of Justinmind widgets, drag a dynamic panel to the canvas. Resize it so that fits neatly within the iPhone screen, between the header and footer. Add three extra screens by clicking on the plus button and rename them as the screens mentioned above.
Then, add icons or image widgets that represent each screen and place them in between the header and the dynamic panel on the canvas. Justinmind’s iPhone widget library has a wide variety of icons to choose from.
These icons will help the user navigate your app’s tabs.
Explore other tutorials! Check out this one on how to prototype a grocery app in 7 simple steps.
Your wishlist app’s home screen
Use image, text box and paragraph widgets to create your home screen content. Tip: make sure you are in the correct panel by choosing from the drop down at the top of the dynamic panel.
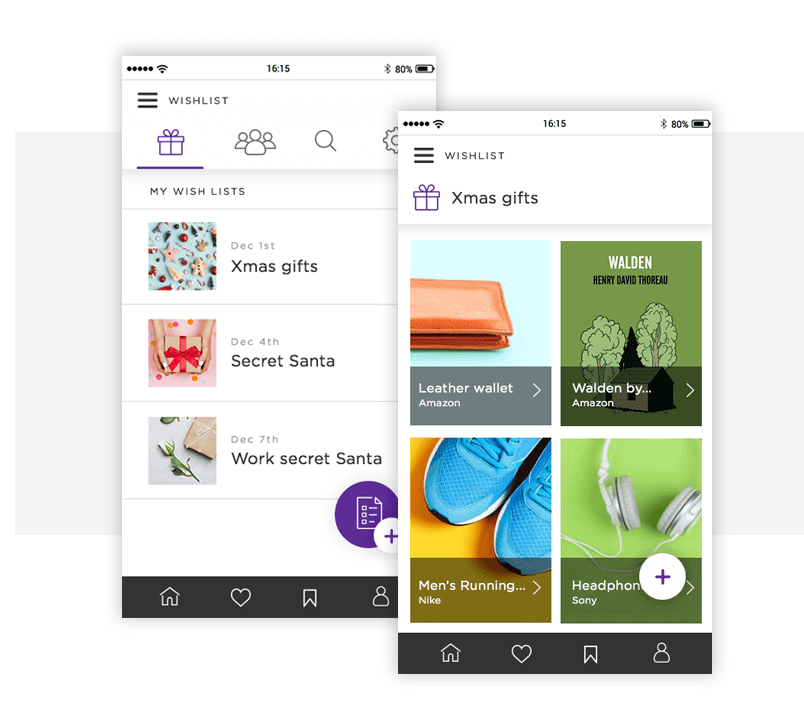
Add a hotspot widget and place it over these widgets. Make sure that it is positioned above all other widgets in the panel in the Outline palette and group all items together inside your dynamic panel’s panel.
Now, add a second screen to your prototype – this will display the contents of your wishlist. Customize it by designing some gifts with image and text box widgets. Tip: steer clear of socks 😉
Now add an event to the hotspot, to allow the user to open their wishlist and browse its contents (from the second screen). Back in Screen 1, select the hotspot widget and go to the Events palette at the bottom of the canvas. Add an ‘On Tap’ + ‘Link To’ event, selecting your wishlist screen.
Simulate your prototype to see how you can navigate to your wish list.
To create another wish list, duplicate the panel’s group and customize it.
Invite friends to use your wishlist app
The next screen that we are going to create is the ‘Invite friends’ screen, from which the user can share gift ideas with their contacts. Here you’ll be using Justinmind’s data-driven prototyping features.
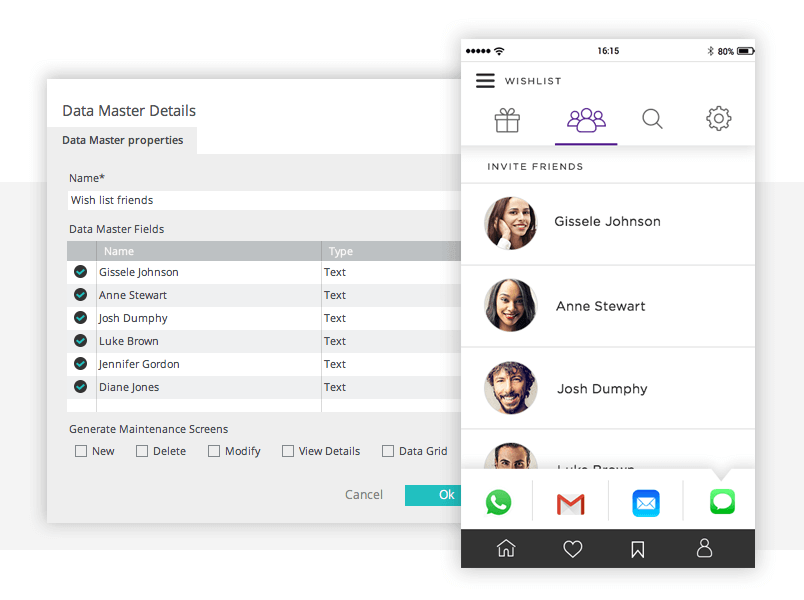
Make sure you are in panel 2 of the dynamic panel. You will need to create and populate a data master with the names of your contacts.
Then, go to the dynamic content widgets and drag the data list widget to the canvas. In the dialog that appears, give your data list an ID, select the data master you’ve just created from the dropdown, and specify which fields you want to include.
Click OK and position the data list on the canvas below your tabs, and leave enough space to add a sharing toolbar between the data list and footer. To add additional rows to your data list, see this tutorial.
Finally, follow our tutorial on how to make contact lists interactive.
Browsing for gifts in your wishlist app
Next, we’ll design the screen where users browse for gifts.
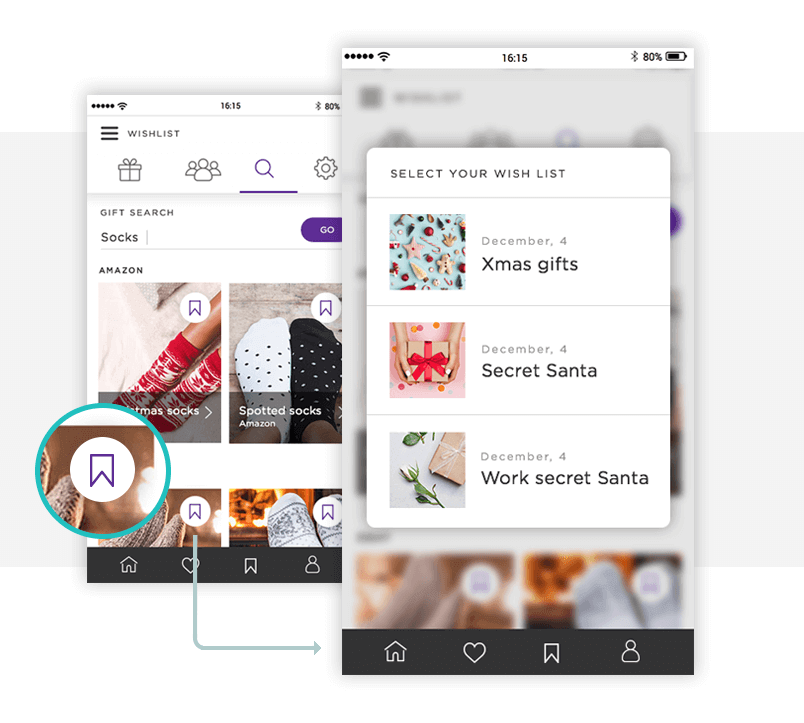
Create your search bar using an input field and button from Justinmind’s basic widget library. Check out this post on search bar best practices.
Next, create an expandable and collapsible grid to display the search results. Use image, text box and rectangle widgets to replicate our grid.
Finally, add an icon that will allow the user to add an item to a wishlist. For instance, the star or bookmark icon from the iPhone widget library.
Swipe between tabs in your wishlist app
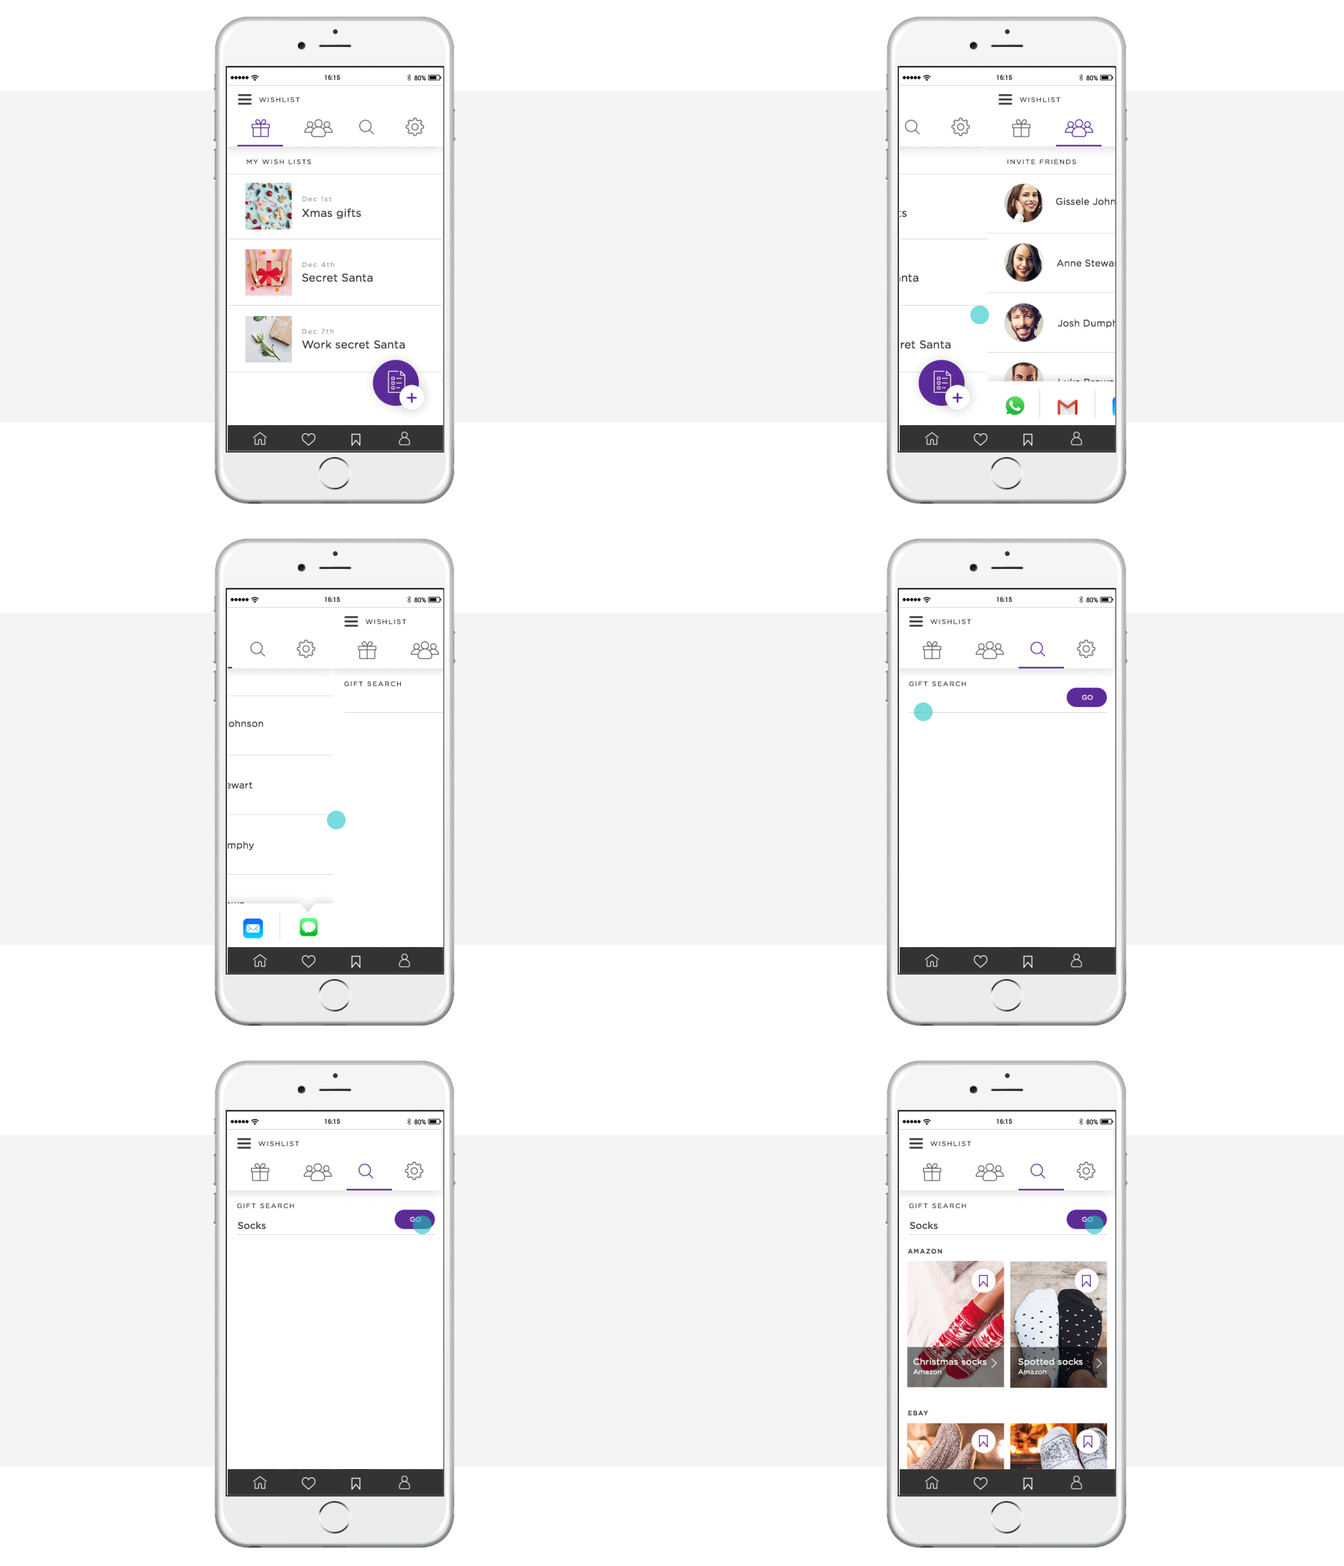
To allow the user to swipe between tabs in your wishlist app, you’ll need to add some gestures. Learn more about creating a high-fidelity prototype with Justinmind’s mobile gestures here.
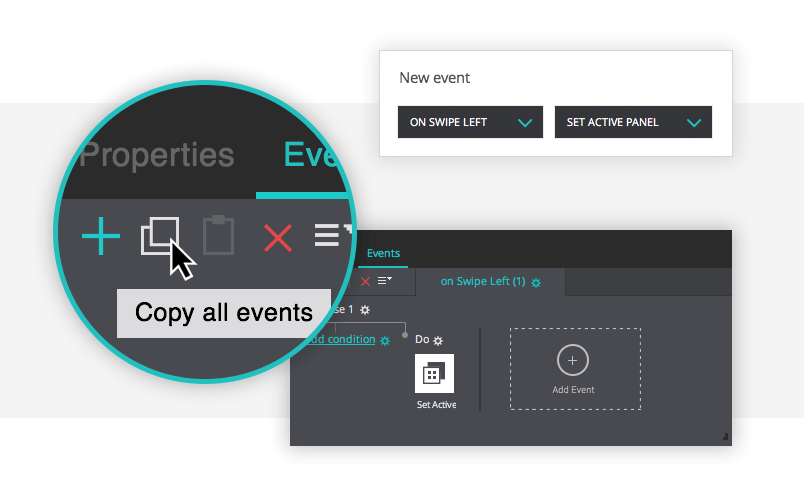
Let’s start by making panel 1 interactive. Select it and add an ‘On Swipe Left’ + ‘Set Active Panel’ event, selecting panel 2 from the Outline Tab. This will allow the user to swipe left from the home screen to the ‘Invite friends’ screen.
To allow the user to swipe right, back to the home screen, go to panel 2 and add an ‘On Swipe Right’ + ‘Set Active Panel’ event, selecting panel 1 this time.
To make the other tabs interactive, repeat these events (you can copy and paste) to the rest of the panels, changing the active panel each time.
And that’s it! Simulate your wishlist app prototype to see it in action!
How to prototype a wishlist app: the takeaway
The wishlist app provides the ideal online shopping experience. Users are able to browse, store and share gift ideas, making it much easier and efficient to organize gift swaps.
Gone are the days of emotionless gift-giving. Design your iOS wishlist app with Justinmind now and see for yourself!
Related Content
 UX design portfolios are your chance to showcase your top skills and best work. Check out this post for awesome portfolio examples and websites!10 min Read
 Learn what paper prototypes are, how to make them and how they can help you design better products. Awesome examples and free templates inside!10 min Read
 In this comprehensive study, we dive deep into the world of web design tools, comparing features, pricing, ease of use, and more. Whether you're building a simple landing page or a complex e-commerce store, we've got you covered. Let's explore the best options and help you make an informed decision.30 min Read

